Lunar Panoramic Photography - Apollo 16
NASA's Apollo Lunar Surface Journal (ALSJ)[1] records the details of each mission's period on the lunar surface as a timeline of the activities undertaken, the dialogue between the crew and Mission Control, and the relevant documentary records. Each photograph taken on the mission is catalogued there and each panoramic photograph sequence is also recorded. This page tabulates the Apollo 16 panoramas and, where appropriate, provides updated representations of the panoramas blended using more recent technologies than the originals.
Context
Apollo 16 was the second of Apollo's "J Missions[2]" using an enhanced Lunar Module that was capable of supporting a 3-day stay on the lunar surface *and* the delivery of the Lunar Roving Vehicle (LRV or "Rover") to the surface to allow the crew to extend the range of their exploration and to provide remote TV coverage.
In terms of photography, Apollo 16's crew surpassed their predecessors on Apollo 15 in no short measure. 1800 frames were captured whilst on the lunar surface resulting in around 100 panoramic sequences. An interesting point that arises in the subsequent tables is the ratio of panoramas taken by the Commander (John Young) and the Lunar Module Pilot (Charlie Duke) - Duke takes around four times as many as his colleague and this 4:1 ratio is the highest across all the missions.
The Lunar Module (LM), Orion, landed with its door and ladder leg (AKA "+Z strut") pointing approximately due west. The Sun's elevation[3] was around 22°-25° for EVA 1, 34°-38° for EVA 2, and 46°-49° for EVA 3.
The higher elevations of the Sun across the EVAs can be seen through the improvement in the quality of the panoramas; the Sun itself, and any resulting lens flair, is barely noticeable whereas it featured prominently in the earlier missions.
Rover Panoramas (LVR Pans)
Charlie Duke is credited with inventing a new procedure during EVA 2; the "LRV Pan" or "Rover Pan" (also known as a "360").[4] The process of getting on and off of the rover was protracted due to the bulky suit and backpack that the astronauts wore, but Duke realised that by having Young drive the rover in a tight circle he could snap a panoramic sequence simply by pointing the camera straight ahead and continuously pressing the shutter button from his seated position ("click - click - click - click - click -click"[5])
Although efficient in terms of time and effort, the approach presented some issues:-
- Panoramic sequences are best shot from a single position - in these cases the camera was moved (or was being moved) for each shot
- Every shot contains foreground items (the rover's TV camera and antenna) that impact on as much as 50% of each image
- The camera is subject to the movements and orientation of the rover
- Camera settings have to be changed "On the fly"
The first noted LRV Pan was the sequence AS16-115-18503 to 18511 - see "Timestamp 148:41:11" below. Empirical analysis suggests that the sequence is limited to AS16-115-18107 to 18511 and the result is shown below:-
Non-EVA (LM-based) panoramas
By this, the fifth landing, the need for contingency photos taken from the Lunar Module was greatly reduced, so low in fact, that only one panorama was taken through each of the windows (and subsequently combined). No panoramas were taken from the LM between the EVAs or after the final return.
| Mission | Time (MET) | EVA # | Title | Astronaut | Magazine | Type | Start Frame | End Frame | Source | Reference Panorama | Sourced Alternate | Updated Panorama | Notes |
|---|---|---|---|---|---|---|---|---|---|---|---|---|---|
| XVI | 106:15:45 | Pre-EVA | Post-Landing Window Pan | Young/Duke | 113 | Colour | 18296 | 18310 | ALSJ |  | N/A | JSC2012e052597 | |
| XVI | 106:15:45 | Pre-EVA | Post-Landing Window Pan - CDR | Young | 113 | Colour | 18296 | 18303 | ALSJ | 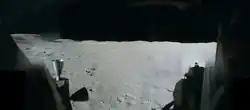 | N/A | Sub-panorama | |
| XVI | 106:15:45 | Pre-EVA | Post-Landing Window Pan - LMP | Duke | 113 | Colour | 18304 | 18310 | ALSJ | 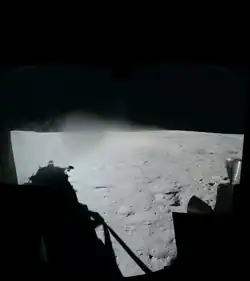 | N/A | Sub-panorama |
EVA Panoramas - EVA 1
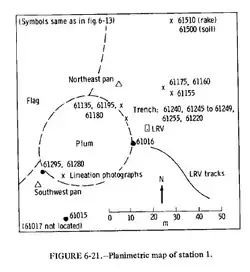
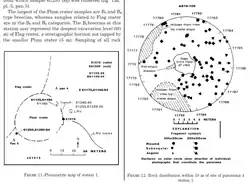
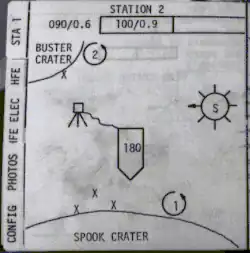
| Mission | Time (MET) | EVA # | Title | Astronaut | Magazine | Type | Start Frame | End Frame | Source | Reference Panorama | ALSJ Alternate | Updated Panorama | Notes |
|---|---|---|---|---|---|---|---|---|---|---|---|---|---|
| XVI | 119:33:46 | EVA 1 | LM 4 O'clock Pan | Duke | 113 | Colour | 18313 | 18330 | ALSJ |  |  | N/A | |
| XVI | 119:33:46 | EVA 1 | LM 4 O'clock Pan North | Duke | 113 | Colour | 18313 | 18322 | ALSJ |  | N/A | Sub-panorama | |
| XVI | 119:33:46 | EVA 1 | LM 4 O'clock Pan South | Duke | 113 | Colour | 18324 | 18330 | ALSJ |  | N/A | Sub-panorama | |
| XVI | 122:12:32 | EVA 1 | ALSEP Pan | Duke | 113 | Colour | 18349 | 18370 | ALSJ |  |   | N/A | |
| XVI | 122:12:32 | EVA 1 | ALSEP Pan North | Duke | 113 | Colour | 18349 | 18360 | ALSJ |  | N/A | Sub-panorama | |
| XVI | 122:12:32 | EVA 1 | ALSEP Pan South | Duke | 113 | Colour | 18361 | 18370 | ALSJ |  | N/A | Sub-panorama | |
| XVI | 122:58:02 | EVA 1 | Outbound Drive to Station 1 - Part 1 | Duke | 109 | Monochrome | 17747 | 17768 | ALSJ | N/A | N/A | Traverse images - omitted | |
| XVI | 123:14:14 | EVA 1 | Outbound Drive to Station 1 - Part 2 | Duke | 109 | Monochrome | 17769 | 17774 | ALSJ | N/A | N/A | Traverse images - omitted | |
| XVI | 123:25:08 | EVA 1 | Charlie's Station 1 Pan | Duke | 109 | Monochrome | 17775 | 17793 | ALSJ |  |  | N/A | |
| XVI | 123:25:08 | EVA 1 | Charlie's Station 1 Pan North | Duke | 109 | Monochrome | 17775 | 17786 | ALSJ |  | N/A | Sub-panorama | |
| XVI | 123:25:08 | EVA 1 | Charlie's Station 1 Pan South | Duke | 109 | Monochrome | 17787 | 17793 | ALSJ |  | N/A | Sub-panorama | |
| XVI | 123:25:08 | EVA 1 | Charlie's Station 1 Pan - Alternative 1 | Duke | 109 | Monochrome | 17775 | 17779 | ALSJ |  | N/A | Sub-panorama | |
| XVI | 123:25:08 | EVA 1 | Charlie's Station 1 Pan - Alternative 2 | Duke | 109 | Monochrome | 17787 | 17792 | ALSJ |  | N/A | Sub-panorama | |
| XVI | 123:25:08 | EVA 1 | Charlie's Station 1 Pan - Alternative 3 | Duke | 109 | Monochrome | 17787 | 17792 | ALSJ |  | N/A | Sub-panorama | |
| XVI | 124:02:22 | EVA 1 | John's Station 1 Pan | Young | 114 | Colour | 18415 | 18432 | ALSJ |  |  | N/A | Alternate from LPI - JSC2012e052598 |
| XVI | 124:02:22 | EVA 1 | John's Station 1 Pan North | Young | 114 | Colour | 18415 | 18323 | ALSJ |  | N/A | Sub-panorama | |
| XVI | 124:02:22 | EVA 1 | John's Station 1 Pan South | Young | 114 | Colour | 18425 | 18432 | ALSJ |  | N/A | Sub-panorama | |
| XVI | 124:02:22 | EVA 1 | John's Station 1 Pan Mono | Young | 114 | Colour | 18418 | 18423 | ALSJ |  | N/A | ||
| XVI | 124:02:22 | EVA 1 | John's Station 1 Pan - Two Charlies | Young | 114 | Colour | 18415 | 18432 | ALSJ |  |  | N/A | |
| XVI | 124:23:34 | EVA 1 | First Station 2 Pan | Duke | 109 | Monochrome | 17811 | 17827 | ALSJ |  |   | N/A | 2nd Alternate from LPI - JSC2012e052599 |
| XVI | 124:23:34 | EVA 1 | First Station 2 Pan North | Duke | 109 | Monochrome | 17811 | 17818 | ALSJ |  | N/A | Sub-panorama | |
| XVI | 124:23:34 | EVA 1 | First Station 2 Pan South | Duke | 109 | Monochrome | 17819 | 17827 | ALSJ |  | N/A | Sub-panorama | |
| XVI | 124:23:34 | EVA 1 | First Station 2 Pan Alternative 1 | Duke | 109 | Monochrome | 17814 | 17825 | ALSJ |  | N/A | Sub-panorama | |
| XVI | 124:23:34 | EVA 1 | First Station 2 Pan Alternative 2 | Duke | 109 | Monochrome | 17814 | 17816 | ALSJ | 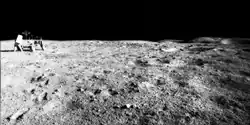 | N/A | Sub-panorama | |
| XVI | 124:23:34 | EVA 1 | First Station 2 Pan Alternative 3 | Duke | 109 | Monochrome | 17821 | 17825 | ALSJ |  | N/A | Sub-panorama | |
| XVI | 124:23:34 | EVA 1 | Buster Crater Partial Pan | Duke | 109 | Monochrome | 17828 | 17836 | ALSJ |  |  | N/A | |
| XVI | 124:28:40 | EVA 1 | 500-mm Stone Mountain from Station 2 | Duke | 112 | Monochrome | 18193 | 18232 | ALSJ |  | N/A | ||
| XVI | 124:28:40 | EVA 1 | 500-mm South Ray from Station 2 | Duke | 112 | Monochrome | 18233 | 18239 | ALSJ |  | N/A | ||
| XVI | 124:48:20 | EVA 1 | Return to the LM from Station 2 | Duke | 109 | Monochrome | 17849 | 07862 | ALSJ | N/A | N/A | Traverse images - omitted | |
| XVI | 125:24:40 | EVA 1 | UV Camera, End of EVA-1 | Young | 114 | Colour | 18439 | 18441 | ALSJ |  |   | N/A | Note the stitching glitches in the second alternate image; the antenna on the LRV appears to be floating above the vehicle! |
EVA Panoramas - EVA 2
| Mission | Time (MET) | EVA # | Title | Astronaut | Magazine | Type | Start Frame | End Frame | Source | Reference Panorama | Sourced Alternate | Updated Panorama | Notes |
|---|---|---|---|---|---|---|---|---|---|---|---|---|---|
| XVI | 143:13:46 | EVA 2 | 4 O'Clock LM Pan, Start of EVA-2 | Duke | 107 | Colour | 17420 | 17440 | ALSJ |  |  | N/A | |
| XVI | 143:13:46 | EVA 2 | 4 O'Clock LM Pan, Start of EVA-2 North | Duke | 107 | Colour | 17420 | 17430 | ALSJ |  | N/A | Sub-panorama | |
| XVI | 143:13:46 | EVA 2 | 4 O'Clock LM Pan, Start of EVA-2 South | Duke | 107 | Colour | 17431 | 17440 | ALSJ |  | N/A | Sub-panorama | |
| XVI | 143:31:21 | EVA 2 | EVA-2 Outbound Traverse, LM to Survey Ridge | Duke | 110 | Monochrome | 17870 | 17888 | ALSJ | N/A | N/A | Traverse - images omitted | |
| XVI | 143:42:15 | EVA 2 | EVA-2 Outbound Traverse, Survey Ridge | Duke | 110 | Monochrome | 17889 | 17907 | ALSJ | N/A | N/A | Traverse - images omitted | |
| XVI | 144:14:29 | EVA 2 | South Ray Crater as seen from Stone Mountain (Station 4) | Duke | 112 | Monochrome | 18243 | 18252 | LPI |  | N/A | JSC2007e045383 | |
| XVI | 144:14:29 | EVA 2 | South Ray Crater and Baby Ray Crater from Station 4 | Duke | 112 | Monochrome | 18243 | 18259 | ALSJ |  | N/A | ||
| XVI | 144:14:29 | EVA 2 | Central Portion of South Ray Crater from Station 4 | Duke | 112 | Monochrome | 18245 | 18248 | ALSJ |  | N/A | Sub-panorama | |
| XVI | 144:14:29 | EVA 2 | Central Portion of South Ray Crater from Station 4 Alternative 1 | Duke | 112 | Monochrome | 18245 | 18252 | ALSJ |  | N/A | Sub-panorama | |
| XVI | 144:14:29 | EVA 2 | Baby Ray Crater from Station 4 | Duke | 112 | Monochrome | 18253 | 18254 | ALSJ |  | N/A | Sub-panorama | |
| XVI | 144:15:20 | EVA 2 | Stubby Crater from Station 4 | Duke | 112 | Monochrome | 18260 | 18268 | ALSJ |  | N/A | ||
| XVI | 144:15:49 | EVA 2 | LM, Smoky Mountain, North Ray Crater, and Ravine Crater from Station 4 | Duke | 112 | Monochrome | 18269 | 18277 | ALSJ |  |  | N/A | |
| XVI | 144:48:00 | EVA 2 | John's Station 4 Pan | Young | 107 | Monochrome | 17467 | 17489 | ALSJ |  |  | N/A | |
| XVI | 144:48:00 | EVA 2 | Station 4 Crater Detail, High Resolution | Young | 107 | Monochrome | 17470 | 17473 | ALSJ |  | N/A | Sub-panorama | |
| XVI | 144:48:00 | EVA 2 | John's Station 4 Pan, Northern Portion | Young | 107 | Monochrome | 17470 | 11472 | ALSJ |  | N/A | Sub-panorama | |
| XVI | 144:56:49 | EVA 2 | Charlie's Station 4 Pan | Duke | 110 | Monochrome | 17952 | 17974 | ALSJ |  | N/A | ||
| XVI | 144:56:49 | EVA 2 | Station 4 Rover | Duke | 110 | Monochrome | 17960 | 17961 | ALSJ |  | N/A | Sub-panorama | |
| XVI | 144:57:16 | EVA 2 | Station 4 Rover Tracks | Duke | 110 | Monochrome | 17960 | 17968 | ALSJ |  | N/A | Sub-panorama | |
| XVI | 143:32:15 | EVA 2 | EVA-2 inbound traverse, Station 4 to Station 5 | Duke | 110 | Monochrome | 17975 | 17990 | ALSJ | N/A | N/A | Traverse - images omitted | |
| XVI | 145:10:20 | EVA 2 | Station 5 Pan | Duke | 110 | Monochrome | 17991 | 18018 | ALSJ |  | N/A | ||
| XVI | 145:58:36 | EVA 2 | Traverse Photos - Station 5 to Station 6 | Duke | 108 | Monochrome | 17585 | 17605 | ALSJ | N/A | N/A | Traverse - images omitted | |
| XVI | 146:11:10 | EVA 2 | Charlie's Station 6 Pan | Duke | 108 | Monochrome | 17606 | 17626 | ALSJ |  | N/A | ||
| XVI | 146:11:10 | EVA 2 | Charlie's Station 6 Pan - John at the Rover | Duke | 108 | Monochrome | 17619 | 17626 | ALSJ |  | N/A | Sub-panorama | |
| XVI | 146:29:22 | EVA 2 | Traverse Photos - Station 6 to Station 8 | Duke | 108 | Monochrome | 17634 | 17662 | ALSJ | N/A | N/A | Traverse - images omitted | |
| XVI | 146:43:51 | EVA 2 | Charlie's Station 8 pan | Duke | 108 | Monochrome | 17663 | 17681 | ALSJ |  | N/A | ||
| XVI | 146:43:51 | EVA 2 | Charlie's Station 8 pan - Antenna | Duke | 108 | Monochrome | 17668 | 17671 | ALSJ |  | N/A | Sub-panorama | |
| XVI | 146:29:22 | EVA 2 | Traverse Photos - Station 8 to Station 9 | Duke | 108 | Monochrome | 17703 | 17713 | ALSJ | N/A | N/A | Traverse - images omitted | |
| XVI | 147:56:45 | EVA 2 | Charlie's Station 9 Pan | Duke | 108 | Monochrome | 17714 | 17739 | ALSJ |  | N/A | ||
| XVI | 147:56:45 | EVA 2 | Station 9 LRV Tracks | Duke | 108 | Monochrome | 17733 | 17738 | ALSJ |  | N/A | Sub-panorama | |
| XVI | 148:09:03 | EVA 2 | Station 9 Great Sneak | Duke | 107 | Monochrome | 17560 | 17573 | ALSJ | N/A | N/A | This is a collage, not a panorama (images excluded) | |
| XVI | 148:41:11 | EVA 2 | First "Rover Pan" - Stone Mountain | Duke | 115 | Monochrome | 18507 | 18511 | Original | N/A |  | Panorama created by cropping out foreground | |
| XVI | 149:20:40 | EVA 2 | John's ALSEP pan | Young | 114 | Monochrome | 18449 | 18467 | ALSJ |  | N/A | ||
| XVI | 149:20:40 | EVA 2 | John's ALSEP pan Rover | Young | 114 | Monochrome | 18451 | 18463 | ALSJ |  |  | N/A | Alternate from LPI - JSC2011e118362 |
EVA Panoramas - EVA 3
Somewhere between EVAs 2 and 3, the Reseau Plate on one of the cameras was smeared and all of the pictures on magazine 116 were impacted.[6][7] Note the example shown below:-

| Mission | Time (MET) | EVA # | Title | Astronaut | Magazine | Type | Start Frame | End Frame | Source | Reference Panorama | Sourced Alternate | Updated Panorama | Notes |
|---|---|---|---|---|---|---|---|---|---|---|---|---|---|
| XVI | 165:50:58 | EVA 3 | Start of EVA-3, 500mm Stone Mountain Portrait | Young | 105 | Monochrome | 17053 | 17116 | ALSJ |  | N/A | ||
| XVI | 165:57:02 | EVA 3 | Charlie's Plus-Z Pan at the Start of EVA-3 | Duke | 116 | Colour | 18563 | 18691 | ALSJ |  | N/A | ||
| XVI | 165:57:02 | EVA 3 | Charlie's Plus-Z Pan at the Start of EVA-3 HR | Duke | 116 | Colour | 18574 | 18679 | ALSJ |  | N/A | ||
| XVI | 165:57:02 | EVA 3 | Charlie's Plus-Z Pan at the Start of EVA-3 HR LPI | Duke | 116 | Colour | 18565 | 18591 | LPI |  | N/A | JSC2007e045380 | |
| XVI | 165:57:02 | EVA 3 | Apollo 16 Landing Site | Duke | 116 | Colour | 18573 | 18582 | LPI |  | N/A | JSC2011e118363 | |
| XVI | 166:53:20 | EVA 3 | North Ray Crater Interior, 500-mm Pan | Duke | 105 | Monochrome | 17117 | 17181 | ALSJ |  | N/A | ||
| XVI | 166:49:06 | EVA 3 | John's Station 11 Pan | Young | 116 | Colour | 18592 | 18614 | ALSJ |  | |||
| XVI | 166:49:06 | EVA 3 | John's Station 11 Pan - Rover | Young | 116 | Colour | 18597 | 18607 | ALSJ |  | N/A | Sub-Panorama | |
| XVI | 166:49:06 | EVA 3 | John's Station 11 Pan - Rover 2 | Young | 116 | Colour | 18606 | 18609 | ALSJ |  | N/A | Sub-Panorama | |
| XVI | 166:49:06 | EVA 3 | John's Station 11 Pan - LPI | Young | 116 | Monochrome | 18594 | 18613 | LPI |  | N/A | Sub-Panorama. JSC2007e045381 | |
| XVI | - | EVA 3 | Rover TV panormama at Station 11 | - | - | Color | - | - | Video at ALSJ |  | N/A | 360 degrees | |
| XVI | 166:58:00 | EVA 3 | North Ray Crater, 1st Polarization Pan | Duke | 106 | Monochrome | 17239 | 17248 | ALSJ |  |   | N/A | |
| XVI | 166:58:00 | EVA 3 | North Ray, 2nd Polarization Pan | Duke | 106 | Monochrome | 17249 | 17262 | ALSJ |  |  | N/A | |
| XVI | 166:58:00 | EVA 3 | North Ray, 3rd Polarization Pan | Duke | 106 | Monochrome | 17263 | 18276 | ALSJ |  |  | N/A | |
| XVI | 167:04:40 | EVA 3 | North Ray, 4th Polarization Pan | Duke | 106 | Monochrome | 17277 | 17286 | ALSJ |  | | N/A | |
| XVI | 167:04:40 | EVA 3 | North Ray, 5th Polarization Pan | Duke | 106 | Monochrome | 17290 | 17303 | ALSJ |  |  | N/A | |
| XVI | 167:04:40 | EVA 3 | North Ray, 6th Polarization Pan | Duke | 106 | Monochrome | 17304 | 17317 | ALSJ |  |  | N/A | |
| XVI | 167:43:21 | EVA 3 | Base of House Rock | Duke | 106 | Monochrome | 17341 | 17344 | ALSJ |  |  | N/A | |
| XVI | 167:54:20 | EVA 3 | Base of House Rock 2 | Duke | 106 | Monochrome | 17349 | 17354 | ALSJ |  | N/A | ||
| XVI | 168:09:26 | EVA 3 | Traverse Photos - Station 11 to Station 13 | Duke | 106 | Monochrome | 17357 | 1738 | ALSJ | N/A | N/A | Traverse, images omitted | |
| XVI | 168:21:49 | EVA 3 | Station 13 Pan | Duke | 106 | Monochrome | 17386 | 17404 | ALSJ |  | N/A | ||
| XVI | 168:21:49 | EVA 3 | John and the Rover at Shadow Rock | Duke | 106 | Monochrome | 17390 | 17393 | ALSJ |  |   | N/A | First alternate sourced from LPI - JSC2007e045382 |
| XVI | 168:35:48 | EVA 3 | Portrait of Shadow Rock | Duke | 106 | Monochrome | 17413 | 17417 | ALSJ |  |  | N/A | |
| XVI | - | EVA 3 | Rover TV panormama at Station 13 | - | - | Color | - | - | Video at ALSJ |  | N/A | 360 degrees | |
| XVI | 168:51:31 | EVA 3 | Second LRV Pan | Duke | 117 | Monochrome | 18746 | 18750 | Original | N/A |  | This Rover Pan is "accidental" in the sense that the composite images were taken whilst seated in the rover, but weren't part of a formalised procedure. | |
| XVI | 169:01:30 | EVA 3 | LRV Pan - Palmetto Crater | Duke | 117 | Monochrome | 18765 | 187771 | Original | N/A |   | Both of these updated images are identical in content, but differ in their brightness and contrast levels. The black areas are where the rover's TV camera has been masked out. | |
| XVI | 169:08:50 | EVA 3 | LRV Pan - Big Sag or Doodlebug Hole | Duke | 117 | Monochrome | 18786 | 187788 | Original | N/A |   | Both of these updated images are identical in content, but differ in their brightness and contrast levels. The black areas are where the rover's TV camera has been masked out. Location name(s) referenced in ALSJ at time reference 169:08:50. | |
| XVI | 169:19:42 | EVA 3 | Station 10-Prime Pan | Duke | 117 | Monochrome | 18801 | 18823 | ALSJ |  | N/A |
Table Column Key
- Mission Flight Number
- Time (MET) Time since lift-off (MET - Mission Elapsed Time)
- EVA # Moonwalk number
- Title Title as extracted from source (i.e. ALSJ/LPI)
- Astronaut Who took the images
- Magazine NASA film canister number
- Type Either Colour or Monochrome
- Start Frame First frame of the panoramic sequence
- End Frame Last frame of the panoramic sequence
- Source Where the panorama was sourced from (Typically ALSJ or LPI[8])
- Reference Panorama Image referred to by ALSJ/LPI for the given Title
- Sourced Alternate Alternate image(s) referred to by ALSJ/LPI for the given Title
- Updated Panorama Unofficial panorama generated by a non-NASA organisation/individual
- Notes Additional detail
Post mission analysis
The primary purpose of taking the panoramic images was to provide the context, or placement, of the activities undertaken during the EVAs. The initial analysis was presented in the Apollo 16 Preliminary Science Report. The images continue to be revisited periodically with new, cleaner, representations of the panoramas after being processed by increasingly sophisticated software packages. Examples of these include LPI's Apollo Surface Panorama page,[9] NASA's Johnson Space Center (JSC) 'Anniversary' Panoramas,[10], Mike Constantine's Apollo: The Panoramas[11], and Andy Saunders' Apollo Remastered.[12]
See also
Footnotes
These tables catalogue the panoramic photos captured during the Apollo 16 mission. Entries in the 'Updated Panorama' column have been created using panorama blending software working on the High Resolution scans of the original frames held as the "Project Apollo Archive" on Flickr.[13] Where a Reference Panorama is pre-existing, that has been used in preference to creating a new variant, unless there is additional value to be gained by regenerating it. Apart from some source image masking, all such new variants have been created using the minimum of processing, relying on the software package's inherent blending and optimisation capabilities - typically, such panoramas have been created within 3–5 minutes as they are intended to be 'representations' rather than 'definitive' examples. Consequently, brightness and contrast levels, as well as the removal of some frame-edges, have not been adjusted.
All 5-digit image references relate to the last 5 digits of the image names. The full image names follow the format AS16-MMM-NNNNN, where MMM relates to the Magazine number and NNNNN is the identifier.
EVA images include the overlaying of Réseau plate "crosses" to assist in their post-mission evaluation.
Almost all tabular data, such as time and image identifiers, has been extracted from the source location such as the ALSJ or LPI. The entries in the 'Title' column relate to the term used for the panorama as listed in the source's 'Assembled Panoramas' section.[14]
References
- ↑ "Apollo Lunar Surface Journal". www.nasa.gov.
- ↑ "Apollo Lunar Exploration Missions (ALEM) Program and Mission Definition" (PDF). Lunar and Planetary Institute. NASA. Retrieved 28 May 2024.
- ↑ "Sun Angles". www.nasa.gov.
- ↑ "Apollo 16: EVA 2: Return to the LM". www.nasa.gov.
- ↑ "Apollo 16: EVA 3: Return to the LM". www.nasa.gov.
- ↑ "Apollo 16 Mission Report" (PDF). Retrieved 17 April 2024.
- ↑ "Apollo 16 Technical Debrief" (PDF). Retrieved 17 April 2024.
- ↑ "Lunar and Planetary Institute".
- ↑ "LPI (Lunar and Planetary Institute) Apollo Surface Panoramas". Retrieved 15 January 2025.
- ↑ "Apollo Panoramas". Flickr. Retrieved 15 January 2025.
- ↑ Constantine, Mike (2015). Apollo: The Panoramas. London: Moonpans.com Ltd. ISBN 978-0993373107.
- ↑ Saunders, Andy (2022). Apollo remastered. Dublin: Particular Books. ISBN 9780241508695.
- ↑ "Project Apollo Archive". Flickr.
- ↑ "Apollo 16 Map and Image Library". www.nasa.gov.
| Launch complexes |  | ||||||||||
|---|---|---|---|---|---|---|---|---|---|---|---|
| Ground facilities | |||||||||||
| Launch vehicles | |||||||||||
| Spacecraft and rover | |||||||||||
| Flights |
| ||||||||||
| Apollo 8 specific | |||||||||||
| Apollo 11 specific | |||||||||||
| Apollo 12 specific | |||||||||||
| Apollo 13 specific | |||||||||||
| Apollo 14 specific | |||||||||||
| Apollo 15 specific | |||||||||||
| Apollo 16 specific | |||||||||||
| Apollo 17 specific | |||||||||||
| Post-Apollo capsule use | |||||||||||
| Training | |||||||||||
| Related | |||||||||||
| |||||||||||
