Lunar Panoramic Photography - Apollo 14
NASA's Apollo Lunar Surface Journal (ALSJ)[1] records the details of each mission's time on the lunar surface as a timeline of the activities undertaken, the dialogue between the crew and Mission Control, and the relevant documentary records. Each photograph taken on the mission is catalogued there and each photographic sequence is also recorded. This page tabulates the Apollo 14 panoramas and, where appropriate, provides updated representations of the panoramas blended using more recent technologies than the originals.
Although the taking of panoramic photos on the surface featured highly in the plans of all the landings, the process by which the astronauts were trained to take them is not well recorded (Phinney[2] is probably the best source). Although some members of the astronauts corps were acknowledged as being "camera buffs", the majority had little or no experience of the principles of photography, and all required training in the use of the chosen camera, the Hasselblad 500 EL,[3] long considered as one of the best cameras available. As good as the cameras were, the astronauts had to overcome dealing without a viewfinder, and manually changing the aperture and exposure settings to make allowance for the low Sun angles, all while wearing a spacesuit. Each frame for a panoramic mosaic would require individual changes, for example.
Context
Despite the successes of Apollo 11 and Apollo 12, Apollo 14 was something of a "Recovery Mission" following the incomplete nature of Apollo 13. Since the decision had already been made for Apollo 13 to visit the Fra Mauro Formation for scientific purposes, this was simply moved forward to be Apollo 14's destination as well. Also, since the mission was designated as an "H" Mission, the profile was similar to the earlier H missions, Apollo 12 (and 13), which called for two EVAs rather than the 3 later in the program. Like Apollo 12, the majority of these EVAs occurred "off-camera" as the TV camera was not designed to be portable. The crew were equipped with the Modular Equipment Transporter - a hand-pulled, "workbench" that made its only appearance on this mission. It featured in one of the two highlights from the EVAs as the crew gamefully tried to manouvre it to the rim of Cone Crater before giving up just 20m short of their goal. The other highlight, and probably the event that the mission is best remembered for, was when the Commander, Alan Shepard, attached the head of a golf club to a rake handle and struck a couple of golf balls.
In terms of photography, Apollo 14's crew proved to be less "trigger-happy" than the preceding Apollo 12 crew and only took 417 pictures on the Moon, compared to 583 on the earlier mission. However, 288 of these were components of 17 distinct panoramas and ALSJ lists another 25 sub-panoramas within this list.
The post-mission Preliminary Science Report[4] indicates that the crew took 15[5] panoramas but appears to have missed the "Station C" and "Weird Rock" pans (see below). In some cases, the complete, 360° panoramas were impacted by the low Sun angle and greater detail can be gained by omitting the down-Sun exposures from the panoramic sequences, hence some of the sub-panoramas.
To assist in gaining bearings, the Lunar Module (LM) Antares, landed with its door and ladder leg (AKA "+Z strut") pointing approximately 20° north of due west. The Sun's elevation[6] was between 13° and 15.5° for EVA 1, and 122° and 24.3° for EVA 2.
Non-EVA (LM-based) panoramas
Being the 3rd mission to land on the Moon, the emphasis on taking 'Contingency' photos had declined by the time of Apollo 14. Subsequently, only three LM-based panoramas were taken; on landing, between the two EVAs, and prior to departing.
| Mission | Time (MET) | EVA # | Location | Astronaut | Magazine | Type | Start Frame | End Frame | Alternate Panorama | Reference | Reference Panorama | Notes |
|---|---|---|---|---|---|---|---|---|---|---|---|---|
| XIV | 109:46:23 | Pre-EVA | Post-Landing Combined Window Pan | Shepherd/Mitchell | 65 | Monochrome | 9202 | 9215 | N/A | ALSJ |  | Although referenced in the Preliminary Science Report, this "panorama" is really two sub-panoramas taken through each of the main windows on the Lunar Module. The result presented by ALSJ is disjointed because of the separation between camera locations and the parallax issues that causes. The individual sub-panoramas are below. |
| XIV | 109:46:23 | Pre-EVA | Post-Landing LMP Window Pan | Mitchell | 65 | Monochrome | 9202 | 9207 |  | ALSJ |  | Sub-panorama of "Combined" version above. Alternate variant shows different image blending |
| XIV | 109:46:23 | Pre-EVA | Post-Landing CDR Window Pan | Shepherd | 65 | Monochrome | 9209 | 9215 |  | ALSJ |  | Sub-panorama of "Combined" version above. Alternate variant shows different image blending |
| XIV | 119:42:01 | Inter-EVA | Post-EVA-1 Window Pan | Shepherd | 66 | Colour | 9317 | 9326 | N/A | ALSJ |  | As with the Post-Landing Combined Window Pan presented above, this ALSJ-referenced image is best considered as two sub-panoramas (see below) due to the difference in position of the component shots. |
| XIV | 119:42:01 | Inter-EVA | Post-EVA-1 CDR Window Pan | Shepherd | 66 | Colour | 9317 | 9322 |  | ALSJ-inferred | N/A | Sub-panorama of Post-EVA-1 Window Pan above. |
| XIV | 119:42:01 | Inter-EVA | Post-EVA-1 LMP Window Pan | Mitchell | 66 | Colour | 9323 | 9326 |  | ALSJ-inferred | N/A | Sub-panorama of Post-EVA-1 Window Pan above. |
| XIV | 136:26:06 | Post-EVA | Post-EVA-2 Window Pan | Mitchell | 66 | Colour | 9335 | 9343 | N/A | ALSJ | 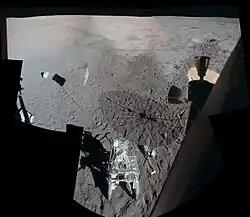 |
EVA Panoramas - EVA 1
The Apollo 14 crew, Alan Shepard and Ed Mitchell, whether constrained by their workload or otherwise, were less inclined to pause to take photos than their predecessors. The taskload[7] for the first EVA was heavily focussed on the deployment of the ALSEP (Apollo Lunar Surface Experiments Package) about 120m west of the Lunar Module. This was a fairly labour-intensive process requiring the astronauts to unstow the ALSEP's packages from the LM, carry them to the required location, and then deploy them, which, in some cases, involved the rolling out of long cables for the experiments. Consequently, there would have been little time available to record anything other than required pictures.
| Mission | Time (MET) | EVA # | Location | Astronaut | Magazine | Type | Start Frame | End Frame | Alternate Panorama | Reference | Reference Panorama | Notes |
|---|---|---|---|---|---|---|---|---|---|---|---|---|
| XIV | 114:53:38 | EVA 1 | LM 4 O'clock Pan | Shepherd | 66 | Colour | 9236 | 9257 | N/A | ALSJ |  | |
| XIV | 114:53:38 | EVA 1 | LM 4 O'clock Pan Hi-Res | Shepherd | 66 | Colour | 9236 | 9257 | N/A | ALSJ |  | Assembled from later releases of Hi-Res scans |
| XIV | 114:53:38 | EVA 1 | LM 4 O'clock Pan Artistic | Shepherd | 66 | Colour | 9236 | 9257 | N/A | ALSJ |  | As listed on ALSJ |
| XIV | 114:53:38 | EVA 1 | LM 4 O'clock Pan 3rd Version | Shepherd | 66 | Colour | 9236 | 9257 | N/A | ALSJ |  | As listed on ALSJ |
| XIV | 114:53:38 | EVA 1 | LM 4 O'clock Pan LM | Shepherd | 66 | Colour | 9250 | 9254 | N/A | ALSJ |  | Sub-panorama featuring just the LM. [This appears to be an error in the ALSJ; This description states that it is AS14-66-9250 through 9255, and yet the displayed image is only 9254 to 9255] |
| XIV | 114:53:38 | EVA 1 | LM 4 O'clock Pan LM - Alternate | Shepherd | 66 | Colour | 9250 | 9257 |  | ALSJ | N/A | Sub-panorama featuring the LM and immediate vicinity - alternate to LM 4 O'clock Pan LM above. |
| XIV | 114:53:38 | EVA 1 | LM 4 O'clock Pan Portrait | Shepherd | 66 | Colour | 9254 | 9255 | N/A | ALSJ |  | Sub-Panorama featuring just the LM |
| XIV | 114:53:38 | EVA 1 | LM 8 O'clock Pan | Shepherd | 66 | Colour | 9271 | 9293 | N/A | ALSJ |  | [A possible error in the ALSJ timetime - this image is indexed at the same time (114:53:38) as the LM 4 O'clock Pan above.] |
| XIV | 114:57:20 | EVA 1 | LM 12 O'clock Pan | Shepherd | 66 | Colour | 9294 | 9316 | N/A | ALSJ |  | |
| XIV | 114:57:20 | EVA 1 | LM 12 O'clock Pan East Hi-Res | Shepherd | 66 | Colour | 9298 | 9312 | N/A | ALSJ |  | Sub-panorama |
| XIV | 114:57:20 | EVA 1 | LM 12 O'clock Pan West Hi-Res | Shepherd | 66 | Colour | 9294 | 9316 | N/A | ALSJ |  | Sub-panorama - 9310-9316 then 9294-9300 |
| XIV | 114:57:20 | EVA 1 | LM 12 O'clock Pan Cone | Shepherd | 66 | Colour | 9305 | 9306 | N/A | ALSJ |  | Sub-panorama - Cone Ridge just to the left of the spacecraft |
EVA Panoramas - EVA 2
The profile of the second EVA was completely different to the previous day's; the deployment of the ALSEP had been completed so it was now time to venture further afield and explore the area. Shortly after reaching the surface, the astronauts set off to the east with the goal of climbing to the rim of the nearby Cone Crater. It would prove to be perhaps the least successful of the mission segments in the whole Apollo program. Due to the ground's topography their journey appeared to be a series of reaching a ridge only to find that another one then lay beyond it. As well as the burden of ascending for most of the way to the rim, the crew were also pulling a Modular Equipment Transporter (MET - "rickshaw") which was used to hold some of their equipment and most of their collected samples. This encountered difficulties in traversing the lunar surface and had to be lifted and carried by both astronauts on several occasions. With the whole EVA being carried out beyond the coverage of the static TV camera back at the LM, Mission Control eventually called a halt to the proceedings on the grounds that the crew were exerting themselves too much and required that they return to the LM. Subsequent photographic analysis revealed that they were probably no more than 20m/60' from the rim when they were called back. Consequently, it is probably not surprising that photography didn't feature highly on this EVA.
| Mission | Time (MET) | EVA # | Title | Astronaut | Magazine | Type | Start Frame | End Frame | Source | Reference Panorama | Sourced Alternate | Updated Panorama | Notes |
|---|---|---|---|---|---|---|---|---|---|---|---|---|---|
| XIV | 132:16:44 | EVA 2 | Station A Pan | Mitchell | 68 | Colour | 9394 | 9408 | N/A | ALSJ |  | ||
| XIV | 132:16:44 | EVA 2 | Station A Pan Minipan | Mitchell | 68 | Colour | 9404 | 9405 | N/A | ALSJ |  | Sub-panorama of Apollo 14 - Station A Pan above. Note the good detail of the MET. | |
| XIV | 132:16:44 | EVA 2 | Station A Pan Hi-Res | Mitchell | 69 | Colour | 9404 | 9407 | N/A | ALSJ |  | Sub-panorama of Apollo 14 - Station A Pan above. | |
| XIV | 132:34:22 | EVA 2 | Station B Pan | Shepherd | 64 | Mono | 9049 | 9072 | N/A | ALSJ |  | ||
| XIV | 132:50:31 | EVA 2 | Station B1 Pan - Profile | Shepherd | 64 | Mono | 9075 | 9097 | N/A | ALSJ |  | A subtle variation between this and the 'Back' variant (below) - this uses 9089 to show Mitchell in profile | |
| XIV | 132:50:31 | EVA 2 | Station B1 Pan - Back | Shepherd | 64 | Mono | 9075 | 9097 | N/A | ALSJ |  | This uses 9088 to show Mitchell's back - see 'Profile' variant above | |
| XIV | 132:50:31 | EVA 2 | Station B1 Pan - Mini-pan | Shepherd | 64 | Mono | 9088 | 9089 |  | ALSJ |  | Sub-panorama | |
| XIV | 132:57:52 | EVA 2 | Station B2 Pan | Mitchell | 68 | Mono | 9415 | 9429 | N/A | ALSJ |  | ||
| XIV | 132:57:52 | EVA 2 | Station B2 Pan North | Mitchell | 68 | Mono | 9415 | 9425 | N/A | ALSJ |  | Sub-Panorama - Annotated | |
| XIV | 132:57:52 | EVA 2 | Station B2 Pan Sun View | Mitchell | 68 | Mono | 9421 | 9422 | N/A | ALSJ |  | ||
| XIV | 133:14:34 | EVA 2 | Station B3 Pan | Mitchell | 68 | Mono | 9430 | 9442 | N/A | ALSJ |  | This is an unusual sequence, left-to-right it runs 9439-9442, then 9430-9438 - it's almost as if Mitchell realised he could capture a larger pan by adding more component shots at the end | |
| XIV | 133:14:34 | EVA 2 | Station B3 North | Mitchell | 68 | Mono | 9430 | 9438 | N/A | ALSJ |  | Sub-panorama (Incorrectly marked in ALSJ as being at 132:57:52) | |
| XIV | 133:23:40 | EVA 2 | Station C-Prime Pan | Shepherd | 64 | Mono | 9098 | 9122 | N/A | ALSJ |  | ||
| XIV | 133:23:40 | EVA 2 | Station C-Prime Pan Hi-Res South | Shepherd | 64 | Mono | 9111 | 9121 | N/A | ALSJ |  | Sub-panorama | |
| XIV | 133:23:40 | EVA 2 | Station C-Prime Pan Hi-Res North | Shepherd | 64 | Mono | 9098 | 9107 | N/A | ALSJ |  | Sub-panorama | |
| XIV | 133:23:40 | EVA 2 | Station C-Prime Pan Hi-Res MET | Shepherd | 64 | Mono | 9119 | 9122 | N/A | ALSJ |  | (ASLJ has incorrectly labelled the source images for this, it should read AS-64-9119-9122 (Not 9019-9022)) | |
| XIV | 133:23:40 | EVA 2 | Station C-Prime Pan Hi-Res Mini-pan | Shepherd | 64 | Mono | 9117 | 9120 | N/A | ALSJ |  | ||
| XIV | 133:40:48 | EVA 2 | Station C1 Pan | Mitchell | 68 | Mono | 9448 | 9451 | N/A | ALSJ |  | Unusual "broken" panorama. The original sources do not overlap. Included because referenced by both ALSJ and the Preliminary Science Report. | |
| XIV | 133:40:48 | EVA 2 | Station C1 Pan Hi-Res Saddle | Mitchell | 68 | Mono | 9449 | 9451 | N/A | ALSJ |  | Sub-panorama | |
| XIV | 134:04:53 | EVA 2 | Weird Rock | Shepherd | 64 | Mono | 9135 | 9136 | N/A | ALSJ |  | ||
| XIV | 134:07:18 | EVA 2 | Station F Pan | Shepherd | 64 | Mono | 9137 | 9157 | N/A | ALSJ |  | ||
| XIV | 134:07:18 | EVA 2 | Station F Pan - Cone | Shepherd | 64 | Mono | 9145 | 9152 | N/A | ALSJ |  | Sub-panorama | |
| XIV | 134:36:42 | EVA 2 | Station G Pan | Shepherd | 64 | Mono | 9167 | 9187 | N/A | ALSJ |  | ||
| XIV | 134:36:42 | EVA 2 | Station G Pan Detail | Shepherd | 64 | Mono | 9167 | 9187 | N/A | ALSJ |  | Sub-panorama | |
| XIV | 135:01:30 | EVA 2 | Station H Pan | Mitchell | 68 | Mono | 9477 | 9491 | N/A | ALSJ |  | ||
| XIV | 135:01:30 | EVA 2 | Station H Pan Detail | Mitchell | 68 | Mono | 9486 | 9487 | N/A | ALSJ |  | Sub-panorama |
Post mission analysis
The primary purpose of taking the panoramic images was to provide the context, or placement, of the activities undertaken during the EVAs. The initial analysis was presented in the Apollo 14 Preliminary Science Report. The images continue to be revisited periodically with new, cleaner, representations of the panoramas after being processed by increasingly sophisticated software packages. Examples of these include LPI's Apollo Surface Panorama page,[8] NASA's Johnson Space Center (JSC) 'Anniversary' Panoramas,[9], Mike Constantine's Apollo: The Panoramas[10], and Andy Saunders' Apollo Remastered.[11]
See also
Footnotes
These tables catalogue the panoramic photos captured during the Apollo 14 mission. Those thumbnails in the "Reference Panorama" and "Notes" columns have been included from 'official' NASA resources such as ALSJ and LPI. Entries in the 'Panorama' column have created using panorama blending software using the High Resolution scans of the original frames held as the "Project Apollo Archive" on Flickr.[12] Where a Reference Panorama is pre-existing, that has been used in preference to creating a new variant, unless there is additional value to be gained by regenerating it. Apart from some source image masking, all such new variants have been created using the minimum of processing, relying on the software package's inherent blending and optimisation capabilities - typically, such panoramas have been created within 3–5 minutes as they are intended to be 'representations' rather than 'definitive' examples. Consequently, brightness and contrast levels, as well as some frame-edges, have not been adjusted. EVA images include the overlaying of Réseau plate "crosses" to assist in their post-mission evaluation.
All 4-digit image references relate to the last 4 digits of the image names. The full image names follow the format AS12-MM-NNNN, where MM relates to the Magazine number and NNNN is the identifier.
All tabular data, such as time and image identifiers, has been extracted from the ALSJ. The entries in the 'Location' column relate to the term used for the panorama as listed in the ALSJ's 'Assembled Panoramas' section
References
- ↑ "Apollo Lunar Surface Journal". www.nasa.gov.
- ↑ Phinney, William C. "Science Training History of the Apollo Astronauts" (PDF). Retrieved 4 February 2025.
- ↑ Hasselblad & the moon landing. Lewes, East Sussex, United Kingdom: Ammonite Press. 2018. ISBN 978-1-78145-334-6.
- ↑ "Apollo 14 Preliminary Science Report NASA SP-272" (PDF). Retrieved 30 March 2024.
- ↑ "Page 41" (PDF).
- ↑ "Sun Angles". www.nasa.gov.
- ↑ "Apollo 14 LUNAR SURFACE PROCEDURES" (PDF). Retrieved 4 February 2025.
- ↑ "LPI (Lunar and Planetary Institute) Apollo Surface Panoramas". Retrieved 15 January 2025.
- ↑ "Apollo Panoramas". Flickr. Retrieved 15 January 2025.
- ↑ Constantine, Mike (2015). Apollo: The Panoramas. London: Moonpans.com Ltd. ISBN 978-0993373107.
- ↑ Saunders, Andy (2022). Apollo remastered. Dublin: Particular Books. ISBN 9780241508695.
- ↑ "Project Apollo Archive". Flickr.
Bibliography
- Apollo 14 Mission Report (PDF). Washington, D.C.: NASA. 1971. MSC-04112. Archived from the original (PDF) on 2024-07-17.
- Apollo 14 Press Kit (PDF). Washington, D.C.: NASA. 1971. 71-3K. Archived from the original (PDF) on 2024-08-23.
- Apollo Program Summary Report (PDF). Houston, Texas: NASA. 1975. JSC-09423. Archived (PDF) from the original on 2022-10-09.
- Brooks, Courtney G.; Grimwood, James M.; Swenson, Loyd S. Jr. (1979). Chariots for Apollo: A History of Manned Lunar Spacecraft (PDF). NASA History Series. Washington, D.C.: Scientific and Technical Information Branch, NASA. ISBN 978-0-486-46756-6. LCCN 79001042. OCLC 4664449. NASA SP-4205. Archived (PDF) from the original on 2022-10-09.
- Chaikin, Andrew (1995) [1994]. A Man on the Moon: The Voyages of the Apollo Astronauts. New York: Penguin Books. ISBN 978-0-14-024146-4.
- Phinney, William C. (2015). Science Training History of the Apollo Astronauts (PDF). Houston, Texas: NASA. SP-2015-626. Archived (PDF) from the original on 2022-10-09.
- Wilhelms, Don E. (1993). To a Rocky Moon: A Geologist's History of Lunar Exploration. Tucson, Arizona: University of Arizona Press. ISBN 978-0-8165-1065-8.
- Thompson, Neal (2004). Light this candle: the life and times of Alan Shepard, America's first spaceman (1st ed.). New York: Crown Publishers. ISBN 0-609-61001-5.
- Stooke, Philip J. (2007). The international atlas of lunar exploration. Cambridge (GB): Cambridge university press. ISBN 978-0-521-81930-5.